Why Arch Linux?
I've been using Arch Linux as my main system for at least a year. Before it, I used to use Debian.
The main initial reason for this choice was to learn more about the Linux environment, since Arch is a minimalist distribution that requires much more manual configuration from the user.
During this journey, I struggled a bit to understand the basics needed to manage the system without breaking everything with every attempt. I can safely say I've had to reinstall Arch dozens of times because, without knowing exactly what I was doing, I ended up corrupting something and couldn't undo it.
But that was also the goal. At that moment, I didn't want an unbreakable system; I wanted to develop enough skill to manage an operating system built by me.
Surprisingly, today Arch feels like the opposite of other systems, a system that's easier to manage, since practically everything that's there I deliberately asked to be there.
While I chose Arch to learn more about Linux, many enthusiasts adopt it for the freedom to build and maintain a system exactly the way they want. In the end, that also ended up being the reason I stayed.
Automating the Arch installation
Arch Linux is known for having one of the most manual installations among Linux distributions. This ends up making the process harder, since it requires more research and technical knowledge to complete successfully.
As I mentioned in the previous section, after many installations this process started to feel more natural.
For a long time I wanted to automate this process for two reasons:
- Automation is cool (and productive). Period.
- Replicate my installation environment in a standardized and consistent way.
Recently, I subscribed to Claude Code, so this ended up being the perfect opportunity to test it and, at the same time, put this desire into practice through a script.
What is this script?
Disclaimer: Arch Linux has an official installer called archinstall. Despite the name, it has no relation to this project. That is, this is not a wrapper for the official archinstall and has no relation to it whatsoever.
An installation script, in practice, is just a program that automatically executes a sequence of commands that would normally be typed manually by the user. Well, at least that was how I saw a Bash script. However, the syntax turned out to be quite different from the times I installed Arch manually, since a script needs to handle some operations that a user normally doesn't need to.
What gets installed/configured?
A minimal and functional Arch Linux (kernel, GRUB, NetworkManager, sudo, git, vim/nano, base-devel) — optionally with a full Cinnamon desktop (Xorg + LightDM + gvfs + network applet) — already partitioned, with an admin user in the wheel group, locale/timezone/keyboard configured, and microcode/VM guest drivers automatically enabled according to the detected hardware.
How to download it?
The most common way is to use git to clone the repository, but the download can also be done directly through GitHub.
Repository link: dotfiles
- Via
git:git clone https://github.com/xyz-leo/dotfiles - Via GitHub: go to the link above and download the repository in
.zipformat.
For this article, the only folder that matters is archinstall. The rest of the repository can be disregarded.
Script flow
Without further ado, now it's time to understand how everything is orchestrated. Let's start with the overall picture of what happens.
Below is the script flow, from execution to completion.
Live ISO (root)
 └─ archinstall.sh
      ├─ sanity checks: root / internet
      ├─ user input: minimal installation or with desktop environment
      ├─ user input: BIOS or UEFI boot mode
      ├─ detects disk, CPU manufacturer, virtualization
      ├─ asks for passwords + input: update keyrings? + shows the plan + confirmation
      ├─ partitions (parted) → formats → mounts
      ├─ (optional) updates archlinux-keyring
      ├─ pacstrap: base + microcode + desktop + virtualization packages
      ├─ genfstab
      └─ arch-chroot /mnt → chroot-setup.sh
              ├─ timezone, locale, keyboard layout, hostname
              ├─ enables NetworkManager
              ├─ sets passwords, creates user, configures sudo
              ├─ grub-install + grub-mkconfig
              ├─ enables LightDM/Cinnamon (if configured)
              └─ enables VM guest services (if detected)
 └─ unmounts → done, reboot
Usage
Requirements:
- Have booted from the Arch ISO
- Working internet connection in the live session
- The boot mode (BIOS/UEFI) is asked at runtime, it's not automatically detected — choose
1(UEFI) only if this session actually booted in UEFI mode (/sys/firmware/efi/efivarsmust exist), otherwise choose0(BIOS). The script warns you, but doesn't stop execution if you choose UEFI withoutefivarspresent.
You never run chroot-setup.sh manually. archinstall.sh copies this file (along with config.sh and a temporary password file) to the newly installed system and runs it via arch-chroot, deleting these temporary files as soon as it finishes.
That said:
- Put the three files in the live environment. On bare metal, the simplest way is to install
git(pacman -Sy git) and clone my repository (git clone https://github.com/xyz-leo/dotfiles). - Review/edit
config.shfor the installation. chmod +x archinstall.sh chroot-setup.sh./archinstall.sh- Answer the questions as they appear:
- Installation type:
0for minimal (no desktop environment),1for desktop environment (Cinnamon). The default is whatever is set inDESKTOP_ENVinconfig.sh. - Boot mode:
0for BIOS,1for UEFI (default). Choose based on how this session actually booted — UEFI only if/sys/firmware/efi/efivarsexists. - Root and user passwords.
- Update keyrings?: the default is No. Answer
yonly if a previous run failed with a package signature error — this usually means the ISO is outdated and yourarchlinux-keyringis obsolete.
- Installation type:
- Carefully read the displayed plan and type
yesto confirm — this wipes the target disk. - When "All done" appears, reboot (
reboot).
All of the questions above are skipped entirely if AUTO_CONFIRM=true is set in config.sh — the installation then runs unattended using the config.sh values as they are (DESKTOP_ENV unchanged, keyring not updated, default UEFI boot mode).
Main config.sh options
Disk and partitions
DISK— Empty = automatically detects if there's a single disk; otherwise, you choose manually.EFI_SIZE_MIB— Fixed size of the EFI System Partition.SWAP_MODE—auto(sized based on RAM) orfixed(usesSWAP_SIZE_MIB).ROOT_FS— Root filesystem (currently onlyext4).
System identity
HOSTNAME,USERNAME,USER_GROUPS— System identity.LOCALE_LANG/LOCALE_REGIONAL— Base locale vs. regional categories (time/currency/paper/etc).TIMEZONE— E.g.:UTC.KEYMAP_CONSOLE/KEYMAP_X11_LAYOUT/KEYMAP_X11_MODEL— TTY keyboard layout vs. graphical (X11) keyboard layout.
Installation
DESKTOP_ENV—cinnamonornone(headless) — default answer for the installation type.AUTO_CONFIRM—trueskips all questions (installation type, boot mode, keyring update, confirmation) and runs unattended, defaulting to UEFI — use with caution.
Final Thoughts
For a long time, I struggled with having different Arch environments across my machines, whether on my main computer or inside a virtual machine. With every new installation, there was always a chance I'd forget a package or a configuration.
Today, that problem has practically disappeared. In just a few minutes, I can go from the live environment to a complete, standardized system that matches my own (or your) needs. Besides saving time, the process eliminates most human error and makes the final result predictable.
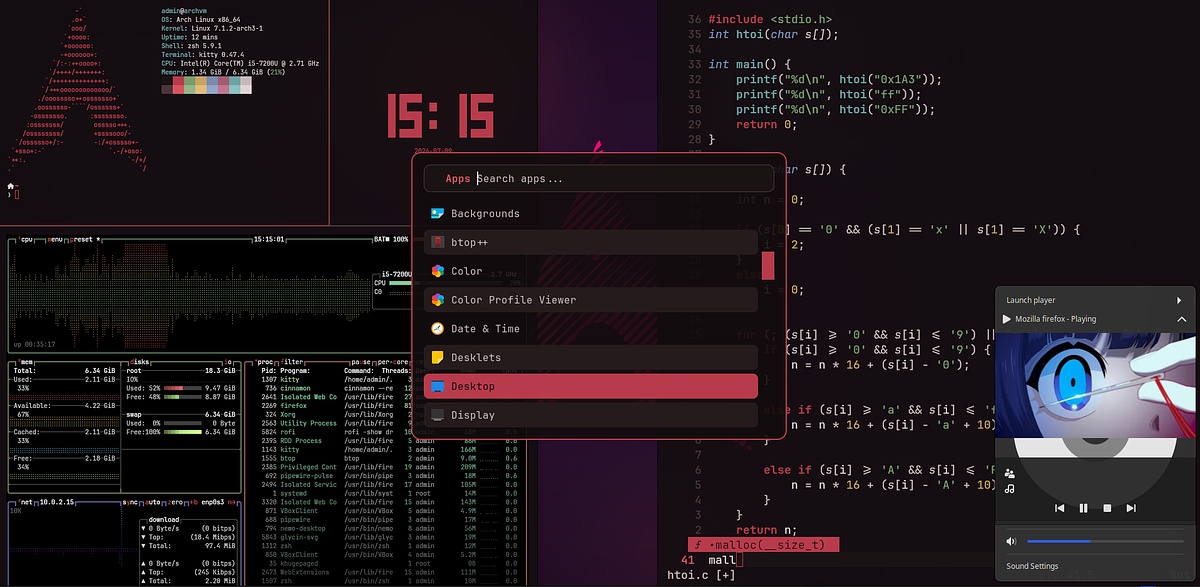
After setting up my dotfiles, this is what I ended up with:
Next Post
In the next post, I'll do a complete breakdown of this script's source code. Expect a long, technical, and fairly dense article.